Classic Vanilla Chocolate Birthday Cupcakes
Fluffy classic vanilla cupcakes topped with creamy, delicious chocolate buttercream. This classic birthday cake flavor is perfect for any party or just because!
This post may contain affiliate links from which, at no additional cost to you, I may earn a small commission to keep this site running. Only products I myself would or do use are recommended.

Why this recipe works
The use of cake flour is key in this cake. You can use store bought or make your own (see note below). It’s lighter and lower in protein, making it ideal for more tender desserts. Another key factor is using both European style butter (for the fluff factor) and a tiny bit of oil (for moisture). Using all oil yields a delicious, super moist cake, but it’s just never as fluffy as those boxed kinds (even though the stupid boxes call for using nothing but oil, which is just some kind of trickery in my opinion…but I digress…). So, beating butter and sugar gives that ideal fluff and adding just a bit of oil helps retain moisture.

Another interesting factor is that I used both granulated and brown sugar here. Brown sugar just gives such a deeper, almost caramelized flavor. Plus, it adds moisture! Win-win! Along with the brown sugar, adding more vanilla than your average recipe is key in making this cake so flavorful. You need at least a tablespoon before you get any real flavor.
The frosting is first of all a classic birthday cake combo. But I also learned that to get that super creamy, soft texture you need heavy cream to soften it out, at least 5 minutes mixing on medium-high to high speed to whip it up to a fluffy texture, then at least a few minutes mixing on low (or stirring by hand, but I am lazy these days) to release the larger air bubbles that the mixing produced. Together, you get a perfect texture, which really brings out that perfect balance of sweet yet rich chocolate.

Key ingredients
Cake flour. You can make your own. For this recipe, you’d want to use 4 1/2 tablespoons (1/4 cup plus 1/2 tablespoon) cornstarch and add that to 1 3/4 cup plus 1 1/2 tablespoons flour. Sift and whisk twice before using in the cake.
Baking powder. Be sure it’s fresh—not open for longer than 6 months (regardless of the expiration date on the box).
Salt. Sea salt is ideal.
Butter. European butter is best for this recipe, as it has less water.
Sugar/brown sugar. Using both adds a bit more flavor and moisture, without making the cake dark.
Eggs. Use fresh, large, room temperature eggs.
Oil. Just a tiny bit of oil (avocado, grape seed, or canola) helps keep this cake moist.
Vanilla. Use pure extract, not imitation.
Whole milk. Whole milk will make a better cake.
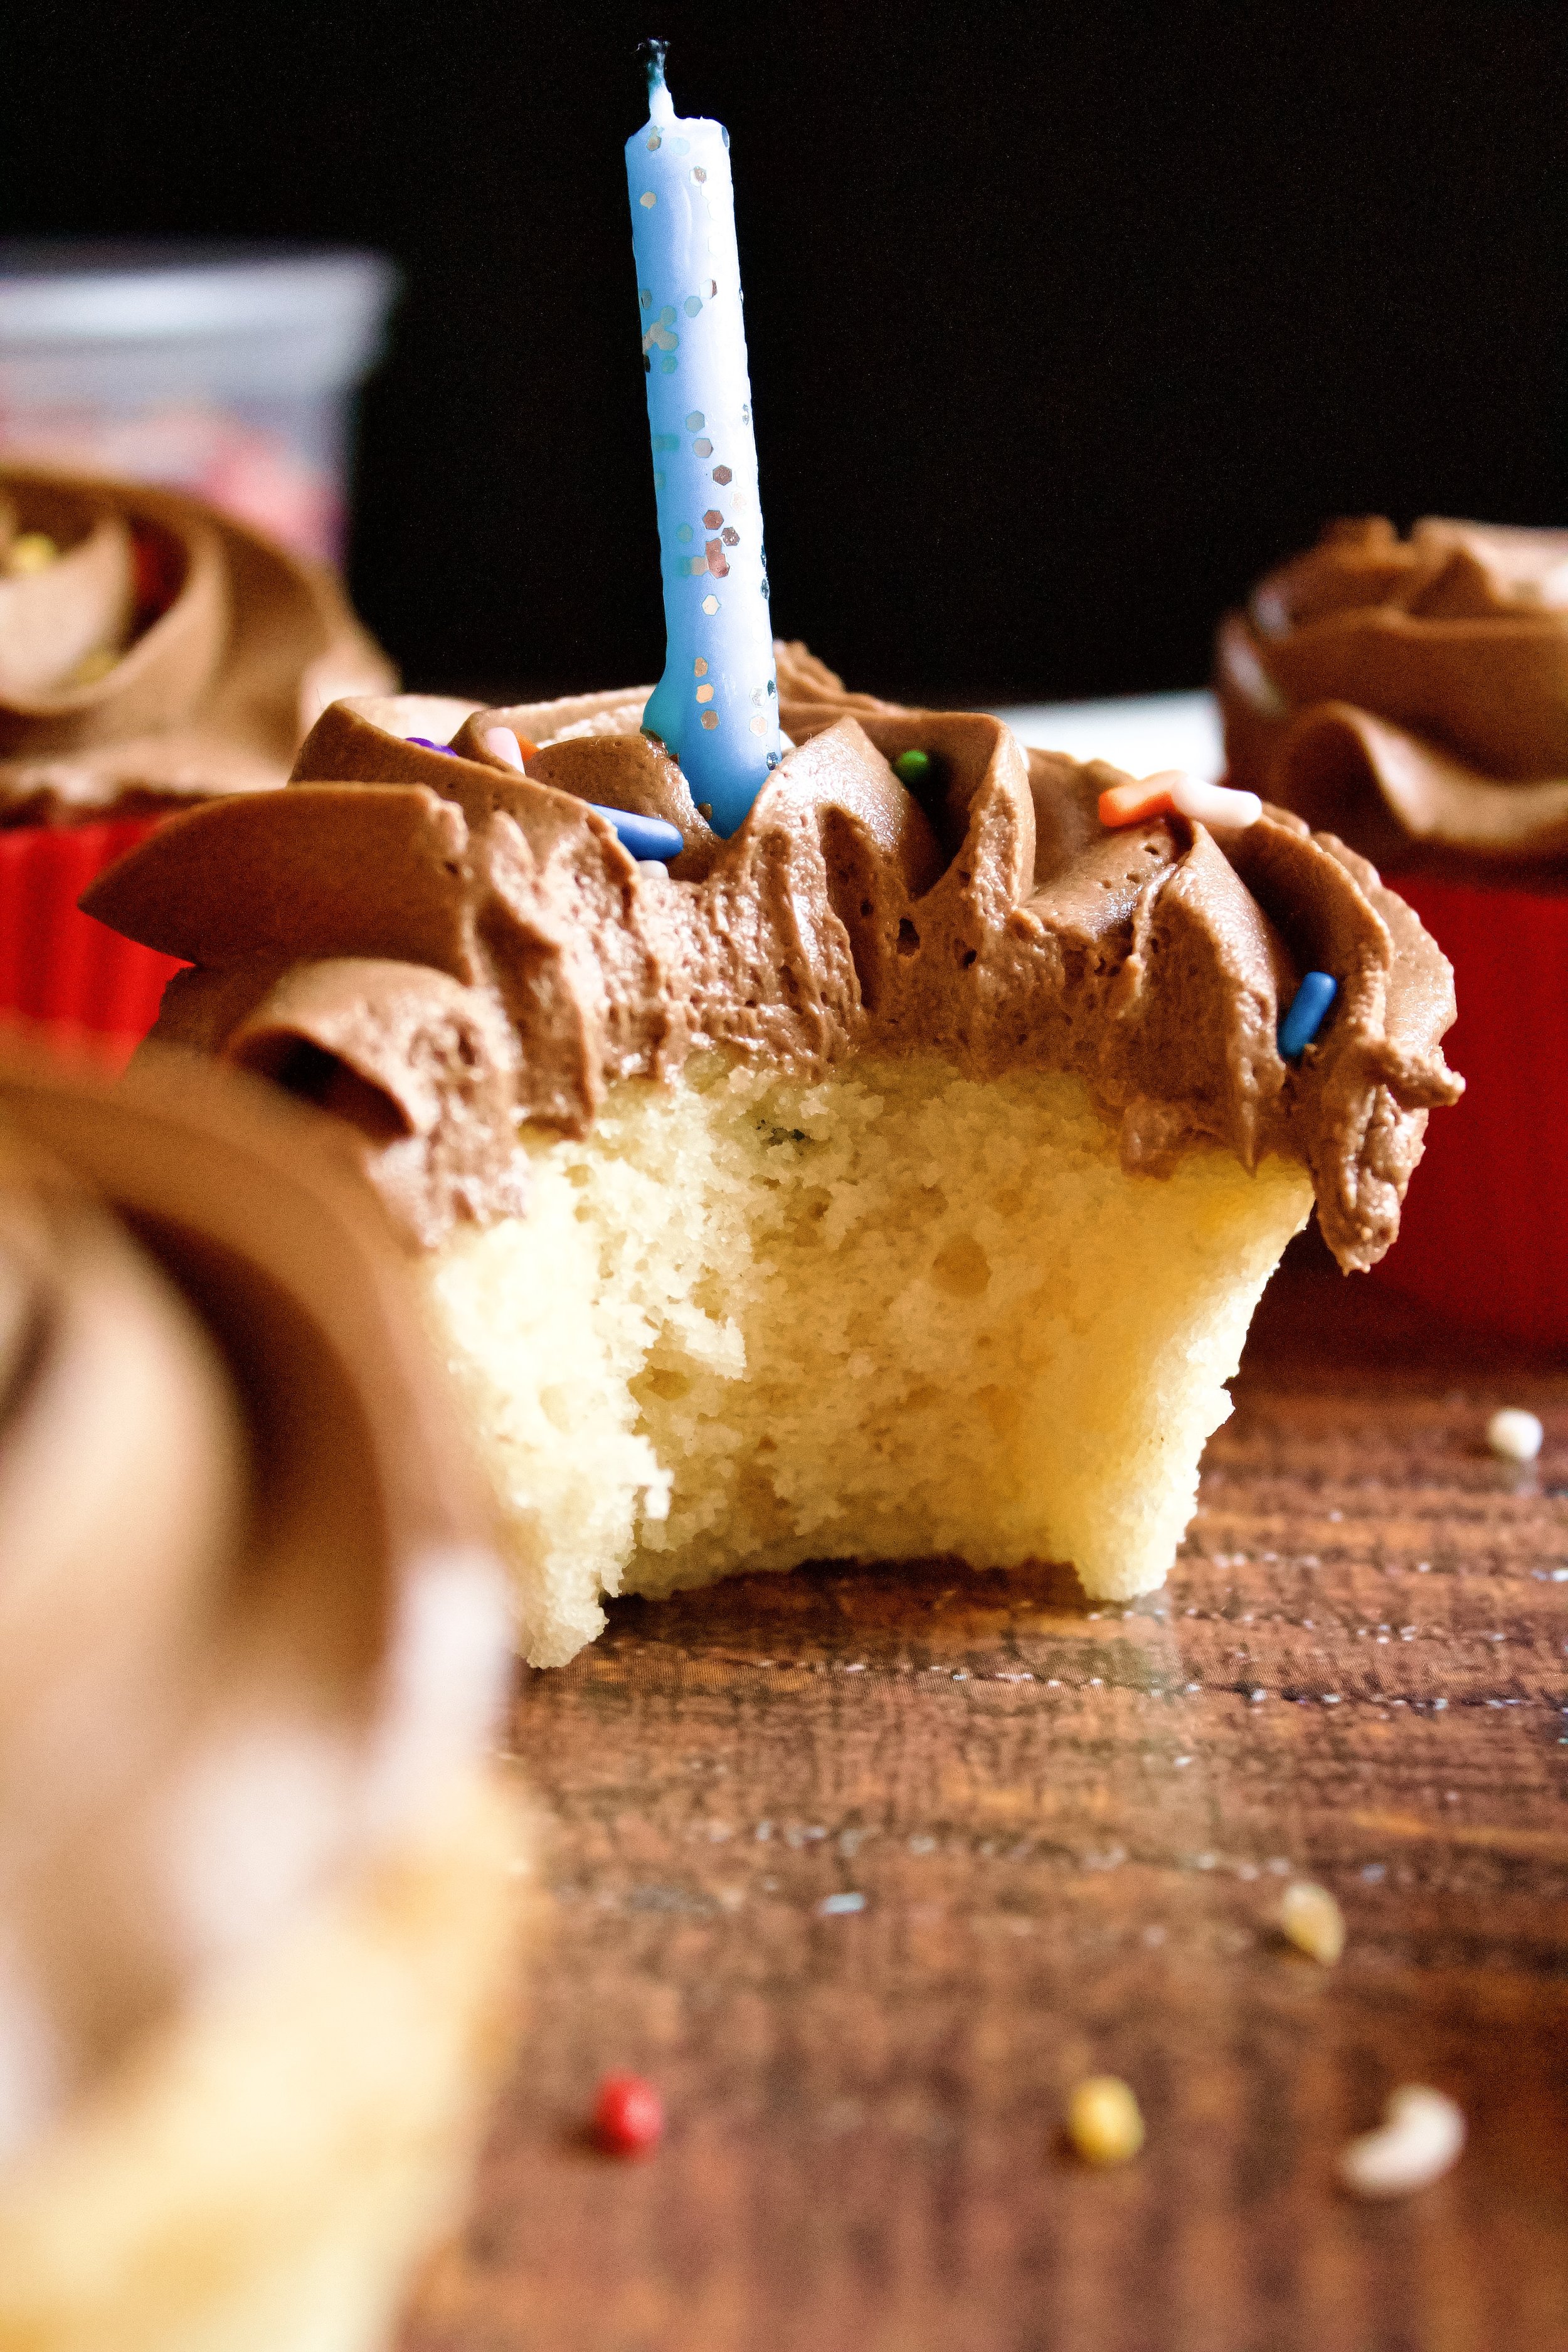
Chocolate buttercream. This is my simplest chocolate buttercream, but I also love my super rich, decadent chocolate ganache buttercream.
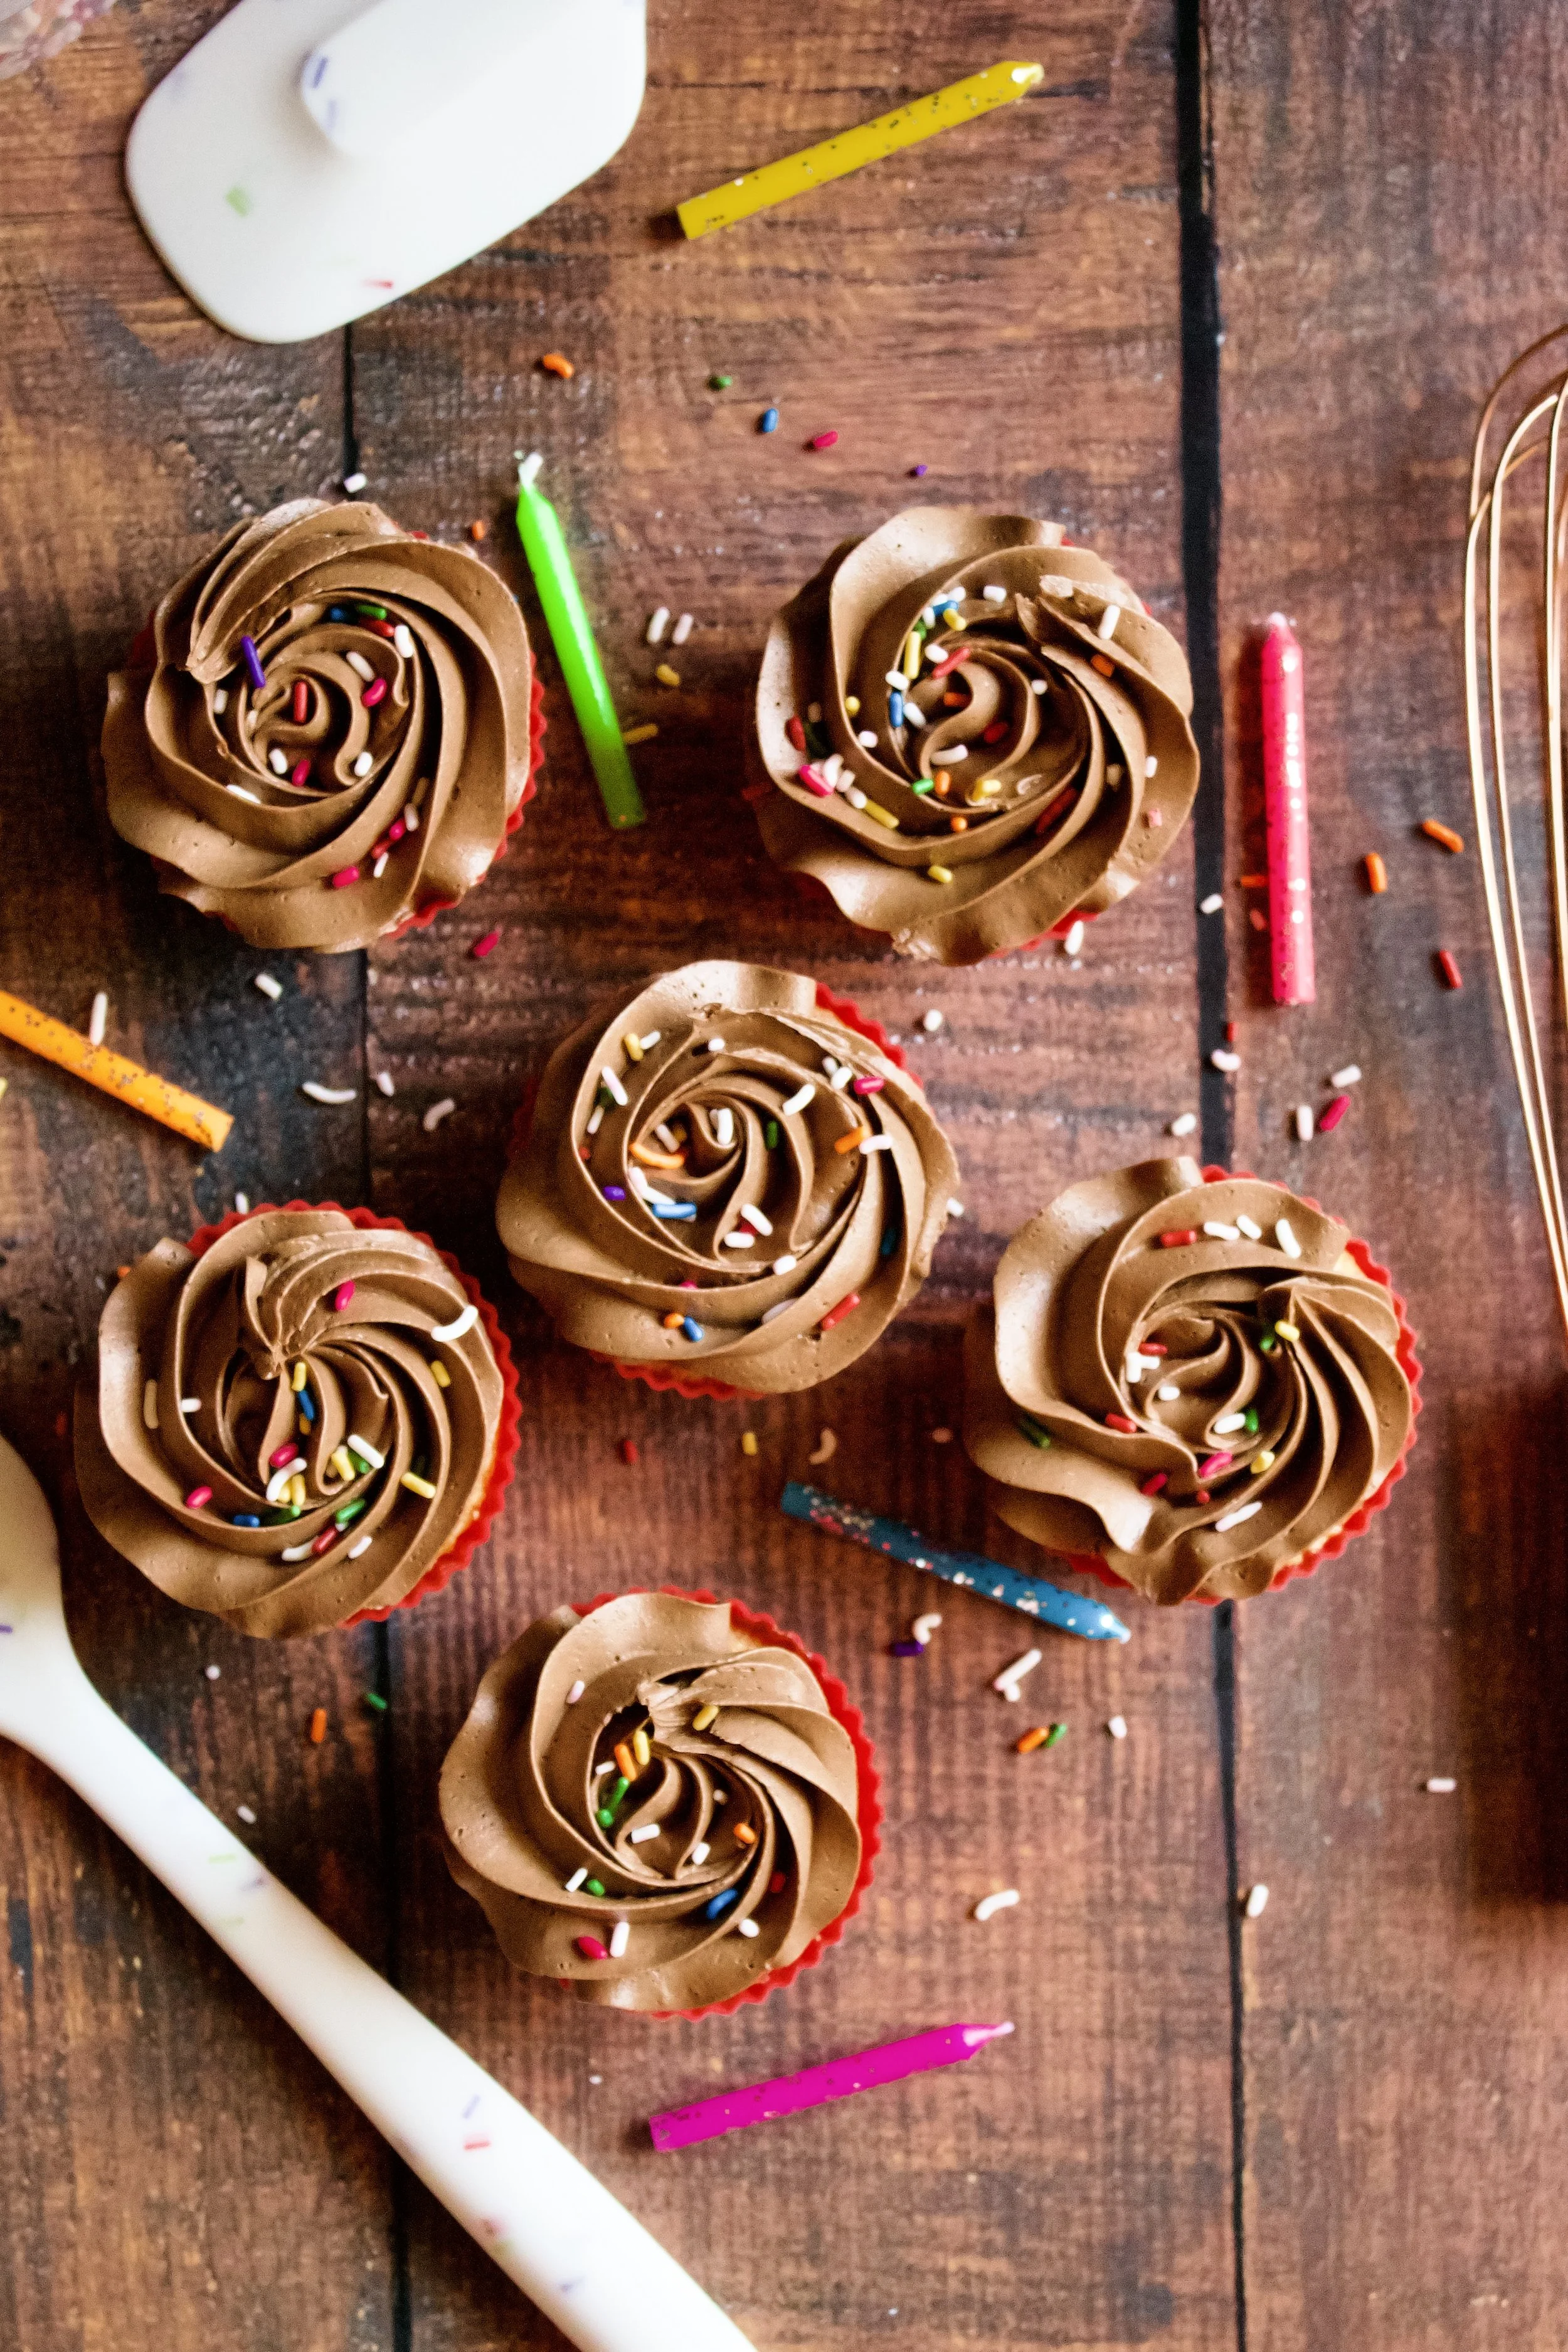
Optional: sprinkles. Jimmies are the most classic tasting here, but you can use any sprinkles you like.

How to make classic vanilla chocolate birthday cupcakes
1. Sift and whisk flour, baking powder, and salt.
2. Beat butter and sugars until light and fluffy. 2-3 minutes minimum on medium high. I usually beat it for about 5 minutes, because we use organic sugar that tends to take longer to break down.
3. Beat in eggs, one at a time. Beat on medium 30-60 seconds after each addition.
4. Beat in oil and vanilla. Beat on medium 30 seconds.
5. Alternate adding flour and milk on low. Beat on low until mostly combined, with some flour still unmixed—the next step will take care of that.


6. Fold in sprinkles. Do this gently and just until mixed.
7. Bake. Pour into prepared cupcake pan(s) and bake until a toothpick comes out with just some moist crumbs.
8. Make the frosting while the cake cools. You can also make this ahead and refrigerate for 1-2 weeks or freeze 1-2 months. Just let it come to room temperature on the counter for a few hours then beat with a hand mixer for about a minute to fluff it back up.
9. Frost and decorate as desired. I used a 1M piping tip and jimmies to decorate.
Enjoy!


Tips and FAQ’s for this recipe
Can I make this into a cake?
Yes! This would work in two 8” or 9” pans, three 6” pans, or one 9x13” pan. For any circular cake, you’re always welcome to cut the layers in half or divide the batter into more pans to make room for more filling—it’s a total personal choice. Baking time will increase, from 20-25 minutes for 6” pans (unless using more than three pans—that will bake faster) to 40-45 minutes for a 9x13 pan. Be sure the cake isn’t any higher than the middle rack of your oven or the top could get a little dark in a larger pan. Tenting with foil toward the end should help with this.

Can I use a different frosting?
Yes! While I made these as classic birthday cakes, you can combine this cake recipe with just about any frosting recipe! Some chocolate variations would be using my chocolate ganache buttercream, Mexican chocolate, red wine chocolate, chocolate marshmallow, chocolate hazelnut, or chocolate orange. After chocolate, my favorite to pair with the vanilla cupcake is rainbow (which is vanilla flavored) or triple lemon (in fact, I suggest adding some lemon zest to the cake if you use lemon frosting!). Other fun options are raspberry, blackberry lavender, coffee, salted caramel, or strawberry.

Can I make these ahead of time?
Yes! Depending on my schedule, I almost always make the frosting at least a few days ahead, whipping it quickly with a hand mixer before using. The cupcakes can be made 1-2 days ahead, if kept well-sealed. I recommend frosting them as close to when you’ll serve them as possible, so the frosting doesn’t cause the cupcake to turn soggy. I don’t recommend freezing cupcakes, as they tend to dry out faster than cake layers.
You can make your own cake flour!
I often make my own, because it’s so easy. One cup of cake flour is just 2 tablespoons cornstarch plus 7/8 cup all-purpose flour. Our, in simpler terms, 2 tablespoons cornstarch scooped into a 1 cup measuring cup then you scoop enough all-purpose flour over that to equal 1 cup (be sure to level it off with the back of a knife). Or, for a more mathematically accurate option for this exact recipe: use 4 1/2 tablespoons (1/4 cup plus 1/2 tablespoon) cornstarch and add that to 1 3/4 cup plus 1 1/2 tablespoons flour. Sift and whisk twice before using in the cake.
Don’t over mix the batter
I know this is the most frustrating tip ever. Like, how would you know??? I try to give you a time or stopping point so you know if you’re mixing too long. In this batter, it’s about how blended it looks. The butter and sugar is hard to over mix (although beyond 3 minutes is more than you need). After that, you’re looking for fully combined, fluffy batter when adding the eggs. Once it’s smooth (scraping the bowl might be necessary), you’re good. Once you add the flour, it actually smooths out, while adding the milk creates a slightly curdled look. This is where you can just ignore the texture and just mix until combined. When you do the next addition of flour, it’ll smooth it back out, as will scraping the bowl and mixing on high for a few seconds at the end. That’s the key—mix just a few seconds then see how smooth it is.

Use room temperature ingredients
I cannot stress enough how important it is to make sure everything is room temperature. In the coldest months I leave my butter, eggs, and dairy out 1-2 hours, whereas in the summer I can get away with 30 minutes. Plan ahead so your cake will rise properly and have the right crumb (which is created partly by the ingredients coming together correctly).
Sift your dry ingredients
This is one of my top baking tips. It’s important to sift the dry ingredients so you get a light, fluffy cake crumb. I’ve tried it both ways and trust me, sifting makes a difference.
Spoon then level your flour
Don’t scoop your flour! I never knew this until I started blogging, but it seriously makes a big difference. You will end up with roughly 25% more flour than the recipe called for if you just doonk (official baking term right there) your measuring spoon into the flour container and scoop. Gently spoon your flour into your measuring cup then level it off with the back of a knife. Trust me! It makes a difference.

My tools
Here are my must-have tools I use for making these cupcakes. Affiliate links provided.
Mesh sieve (because sifting is KEY for a fluffy cake)
All-rubber spatula (this makes scraping the bowl easier so the batter and frosting doesn’t get all over a wooden handle!)
Cupcake pans (I’ve used many over the years and these are the most consistently successful.)
Reusable silicone piping bags (These are super easy to clean—just turn inside out, wear like a mitten, and wash! I stand mine like a cone hat on my tea kettle to dry.)


Classic Vanilla Chocolate Birthday Cupcakes
- prep time: 25-30 minutes (includes frosting)
- bake time: 15-18 minutes
- total time: 45 minutes (plus cooling time)
servings: 24
Ingredients:
- 2 cups plus 2 tablespoons (244g) cake flour, spooned then leveled
- 2 teaspoons (8g) baking powder
- ½ teaspoon (3g) sea salt
- ¾ cup (170g) unsalted butter*, room temperature**
- ¾ cup (150g) granulated sugar
- ¾ cup (150g) light brown sugar
- 3 large eggs, room temperature
- 2 tablespoons (27g) avocado or vegetable oil
- 1 tablespoon (13g) vanilla extract
- 1 cup (240g) whole milk, room temperature
- one batch chocolate buttercream
Instructions:
- Preheat oven to 325F/165C. Line two cupcake pans with cupcake liners.
- In a medium mixing bowl, use a large fine mesh sieve to sift then whisk together cake flour, baking powder, and salt. Set aside.
- In the bowl of a stand mixer fitted with a paddle attachment (or a large mixing bowl with a hand mixer), beat the butter on high until fluffy, about 1 minute. Add the sugar and brown sugar and beat until light and fluffy, about 3 minutes. Scrape the bowl as necessary, at least once.
- Add the eggs, one at a time, mixing on medium until light and fluffy (about 30 seconds) and scraping the bowl after each addition. Add the vanilla and oil and mix on medium until well blended.
- Add half of the flour and mix on low until just barely blended. Add the milk and mix on low until just barely blended. Add the remaining flour and mix on low until just barely blended with some flour streaks still visible.
- Using a rubber spatula, gently fold in sprinkles until evenly mixed in. This will also help mix in the remaining streaks of flour.
- Pour into your prepared cupcake pans, filling about ⅔ full (no more than ¾ full). Bake for 15-18 minutes, or until a toothpick inserted in the middle cupcake comes out clean. Check early, as climate, elevation, and individual ovens can cause the bake time to vary (I’ve had mine bake as quickly as 13 minutes!).
- Let cake cool in the pan 5-10 minutes, then remove to a wire rack to cool completely.
- When the cupcakes are cool, frost as desired (I used a 1M piping tip) and top with sprinkles.
Enjoy!
Keep cupcakes in an airtight container, as they can dry out faster than a frosted cake.
*I highly recommend European style butter! It has less water and makes a richer dessert.
**If your butter has become shiny or oily, put it back in the fridge for 5-10 minutes until it firms up a bit (not hard) and is matte in appearance.