Easy Strawberry Mousse
Silky, flavorful strawberry mousse that’s simple and can be made in advance.Full of strawberry flavor, this decadent yet light treat is equally perfect for Valentine’s Day or a hot summer day.
This post may contain affiliate links from which, at no additional cost to you, I may earn a small commission to keep this site running. Only products I myself would or do use are recommended.
Why this recipe works
This really is an easy recipe. I’ve made it two different ways over the years, both with whipped cream, strawberry jam (homemade and store bought), and gelatin. For the pictures here, I went the more traditional route of adding bloomed gelatin to the heavy cream. But, I added it right as I started whipping the cream, which was perfection. I’ve found that adding it later on in the whipping creates weird chunks of hardened gelatin, as the cream is already so thick that the gelatin doesn’t mix immediately. At the same time, the coldness of the cream can cause part of the gelatin to instantly set, creating gelatinous chunks that don’t ever dissolve. I’ve tried stirring it into the cream before beating, but I’m just not as fast as a mixer, and ended up with a similar issue. So, pouring it in slowly while I start mixing was perfect!

The other method I’ve used in the past is to make my own jam with strawberries and sugar, adding the bloomed gelatin once the jam is done cooking but before I let it cool down. This works pretty similarly, but the only risk is your strawberries. They might be extra juicy and create a too-liquidy jam. It’s also hard to guarantee that—after removing the stems and chopping the berries—you’ll always end up with the same amount of berries in your jam—and that difference can make a big impact when you’re trying to stabilize the mousse with gelatin. This is why I wrote the recipe using a set amount of ready-to-use jam (homemade or store bought). If you’re like me and always worry that the gelatin won’t mix with the cream, you could easily heat the jam up a bit and melt the bloomed gelatin into that.
Both methods are still very simple and result in a delicious, flavorful, creamy mousse that’s silky to eat yet stable enough to fill a pie or even cake!

Key ingredients
Strawberry jam. I usually use homemade, but store bought is fine, too. I suggest tasting it before starting. If it’s super sweet, don’t use powdered sugar. If it’s just right, you’ll actually want some powdered sugar since the whipped cream dilutes the flavor.
Heavy whipping cream. Nope, not a health food, but soooooo creamy and delicious.
Gelatin. This is our secret star ingredient—it has no taste, is healthy for you (although not vegan, but neither is any of this recipe), and just a little helps bring the perfect texture and stabilization.
Water. This is one of those “not an ingredient” ingredients that many recipes don’t list, all in the name of “only 5 ingredients!” I’m not about that life—I want to know all the things. We need just one tablespoon of water to help bloom the gelatin and one tablespoon of boiling to make it liquid again.
Powdered sugar. This is actually optional in the mousse, but I sometimes will add a small bit to my mousse, especially if using a homemade jam that needs some balance. If you plan to
Vanilla. Always necessary! Use pure extract, not imitation.

How to make easy strawberry mousse
1. Bloom gelatin and water. Super simple—add the water to a small bowl, sprinkle the gelatin over it, then stir a little and let it sit while you prep the heavy cream.
2. Prep heavy cream. In a stand mixer, mix cream, vanilla, and powered sugar (optional—depends on how sweet/flavorful your jam already is).
3. Dissolve gelatin. Mix the boiling water with the now-solid gelatin, until liquid.
4. Whip cream and gelatin. Turn the mixer to low and slowly pour the gelatin into it—you want to avoid hitting both the whisk and the side of the bowl, so pour slowly. Once the gelatin is mixed in, turn the mixer to medium (until it stops splattering) then to high until stiff peaks form.


5. Fold into strawberry jam. In three batched, fold the whipped cream into the jam in a medium bowl. Taste partway through, adding more jam if the flavor isn’t very bright.
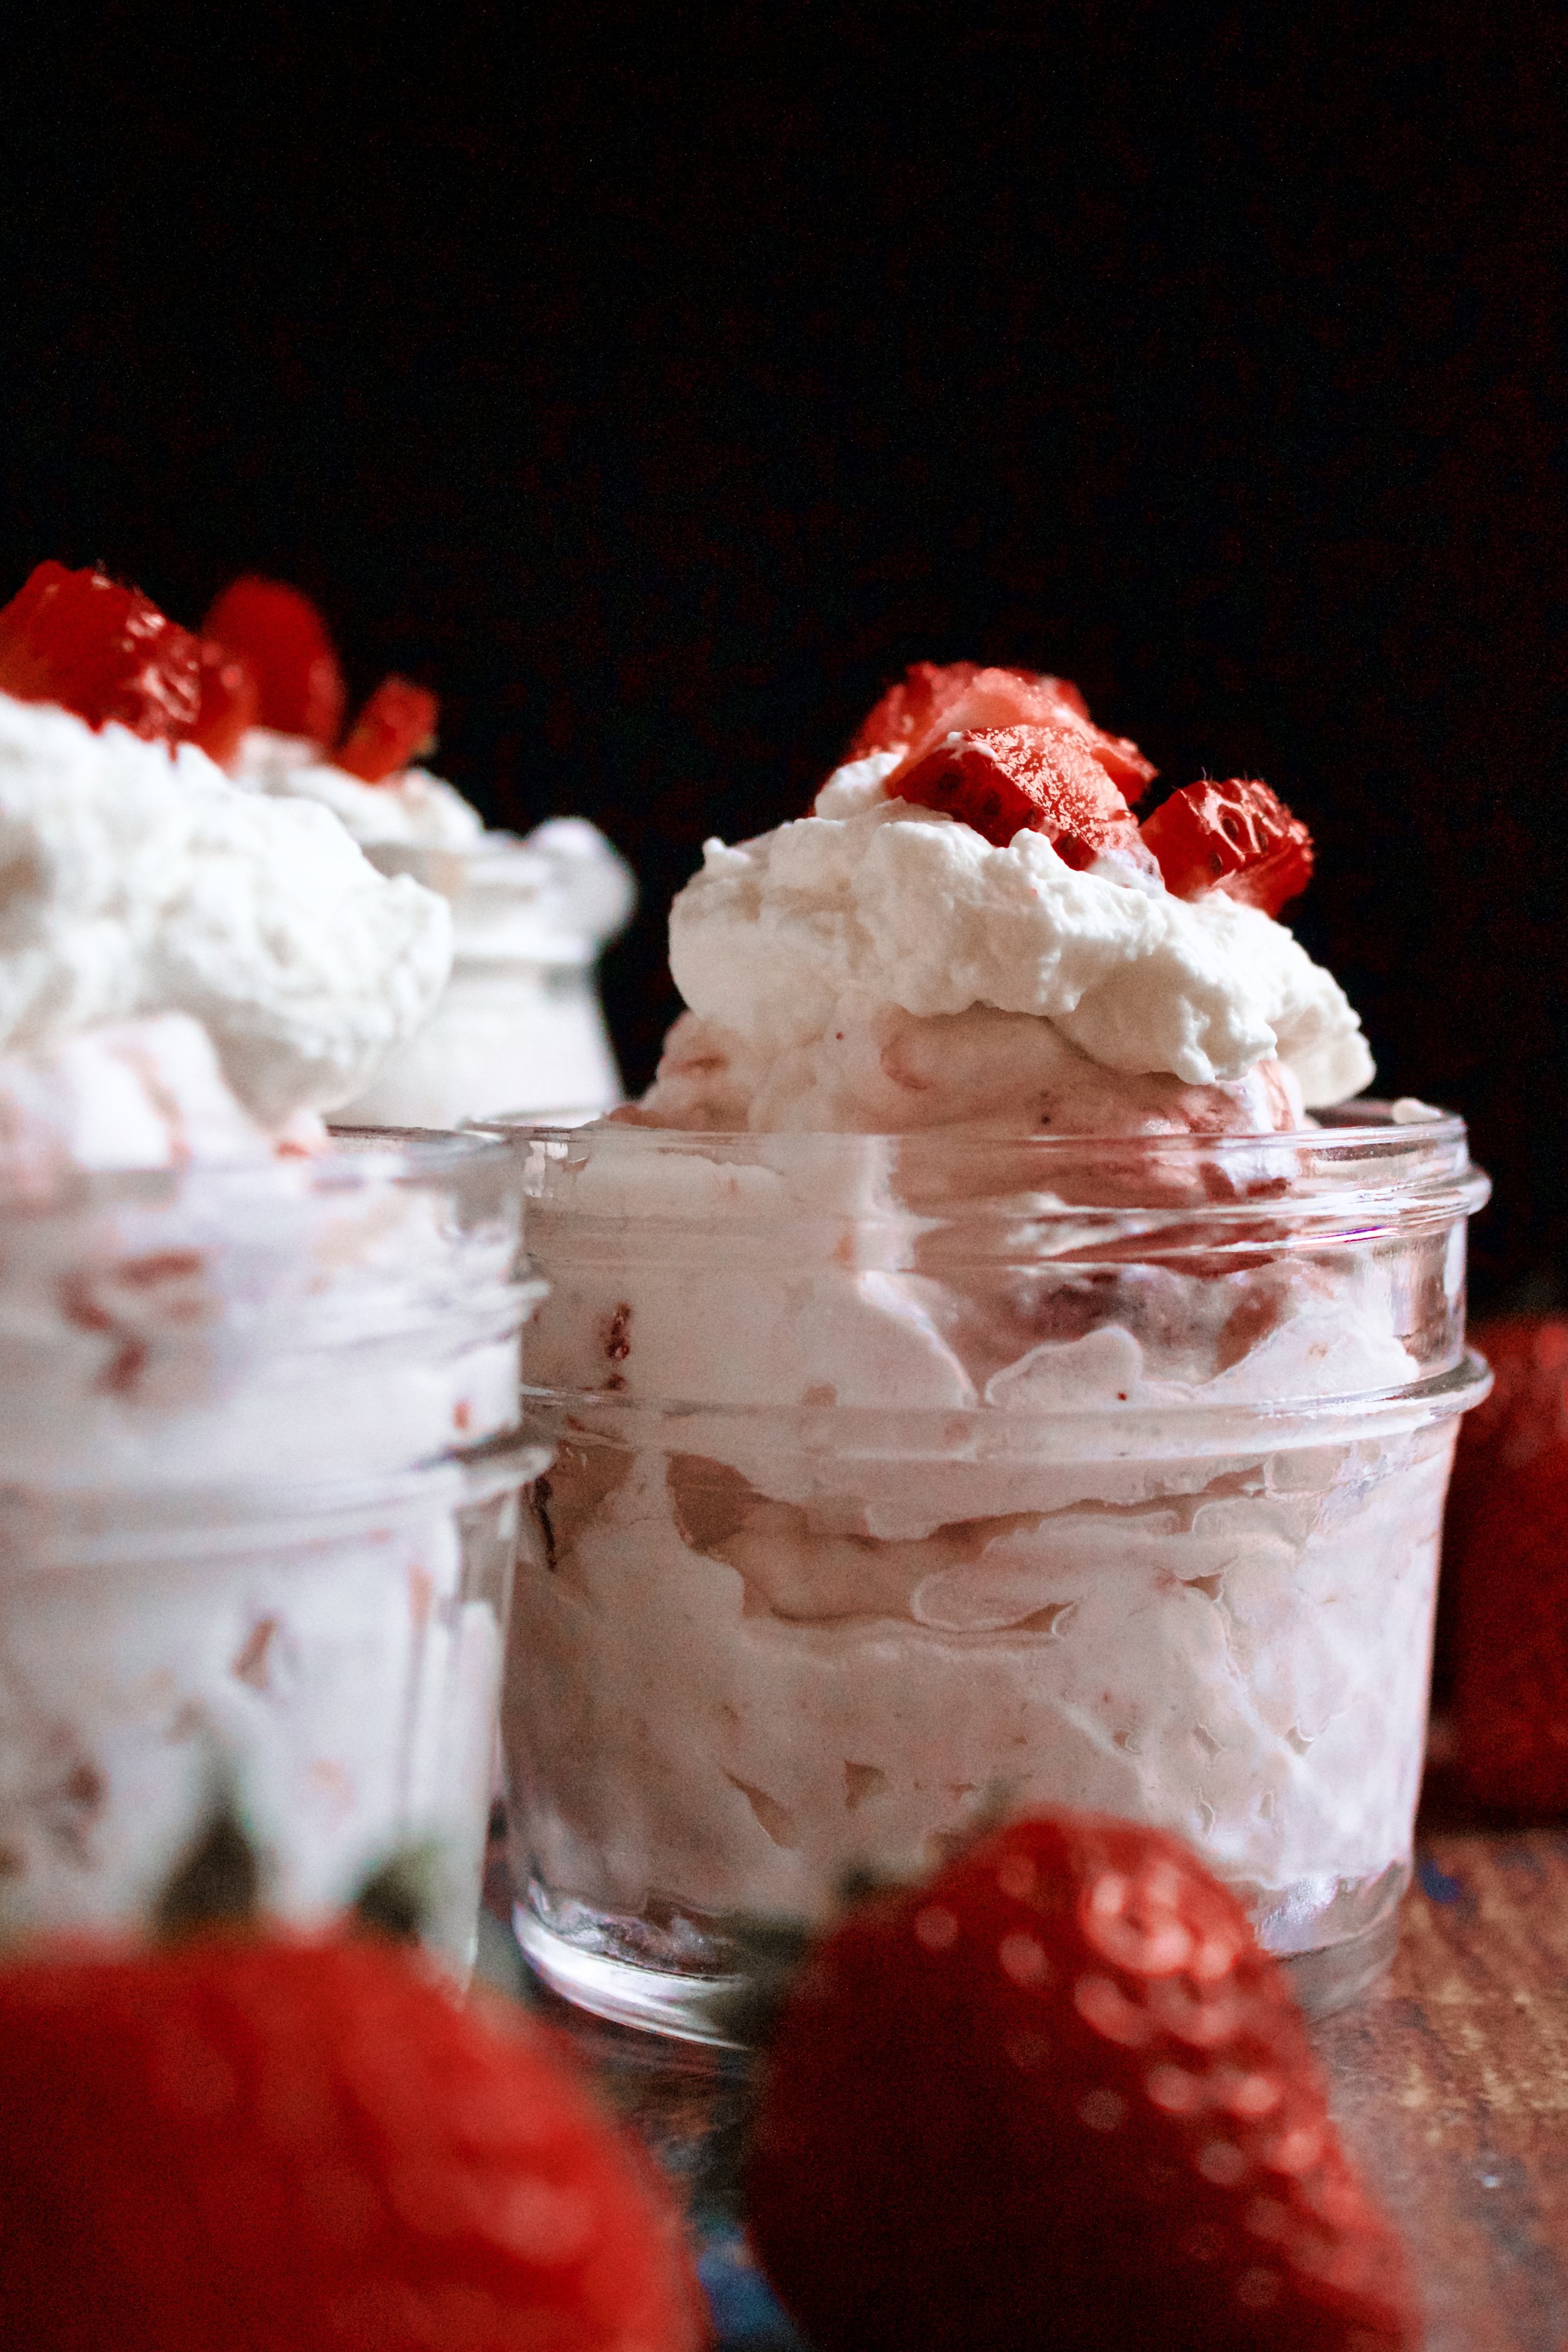
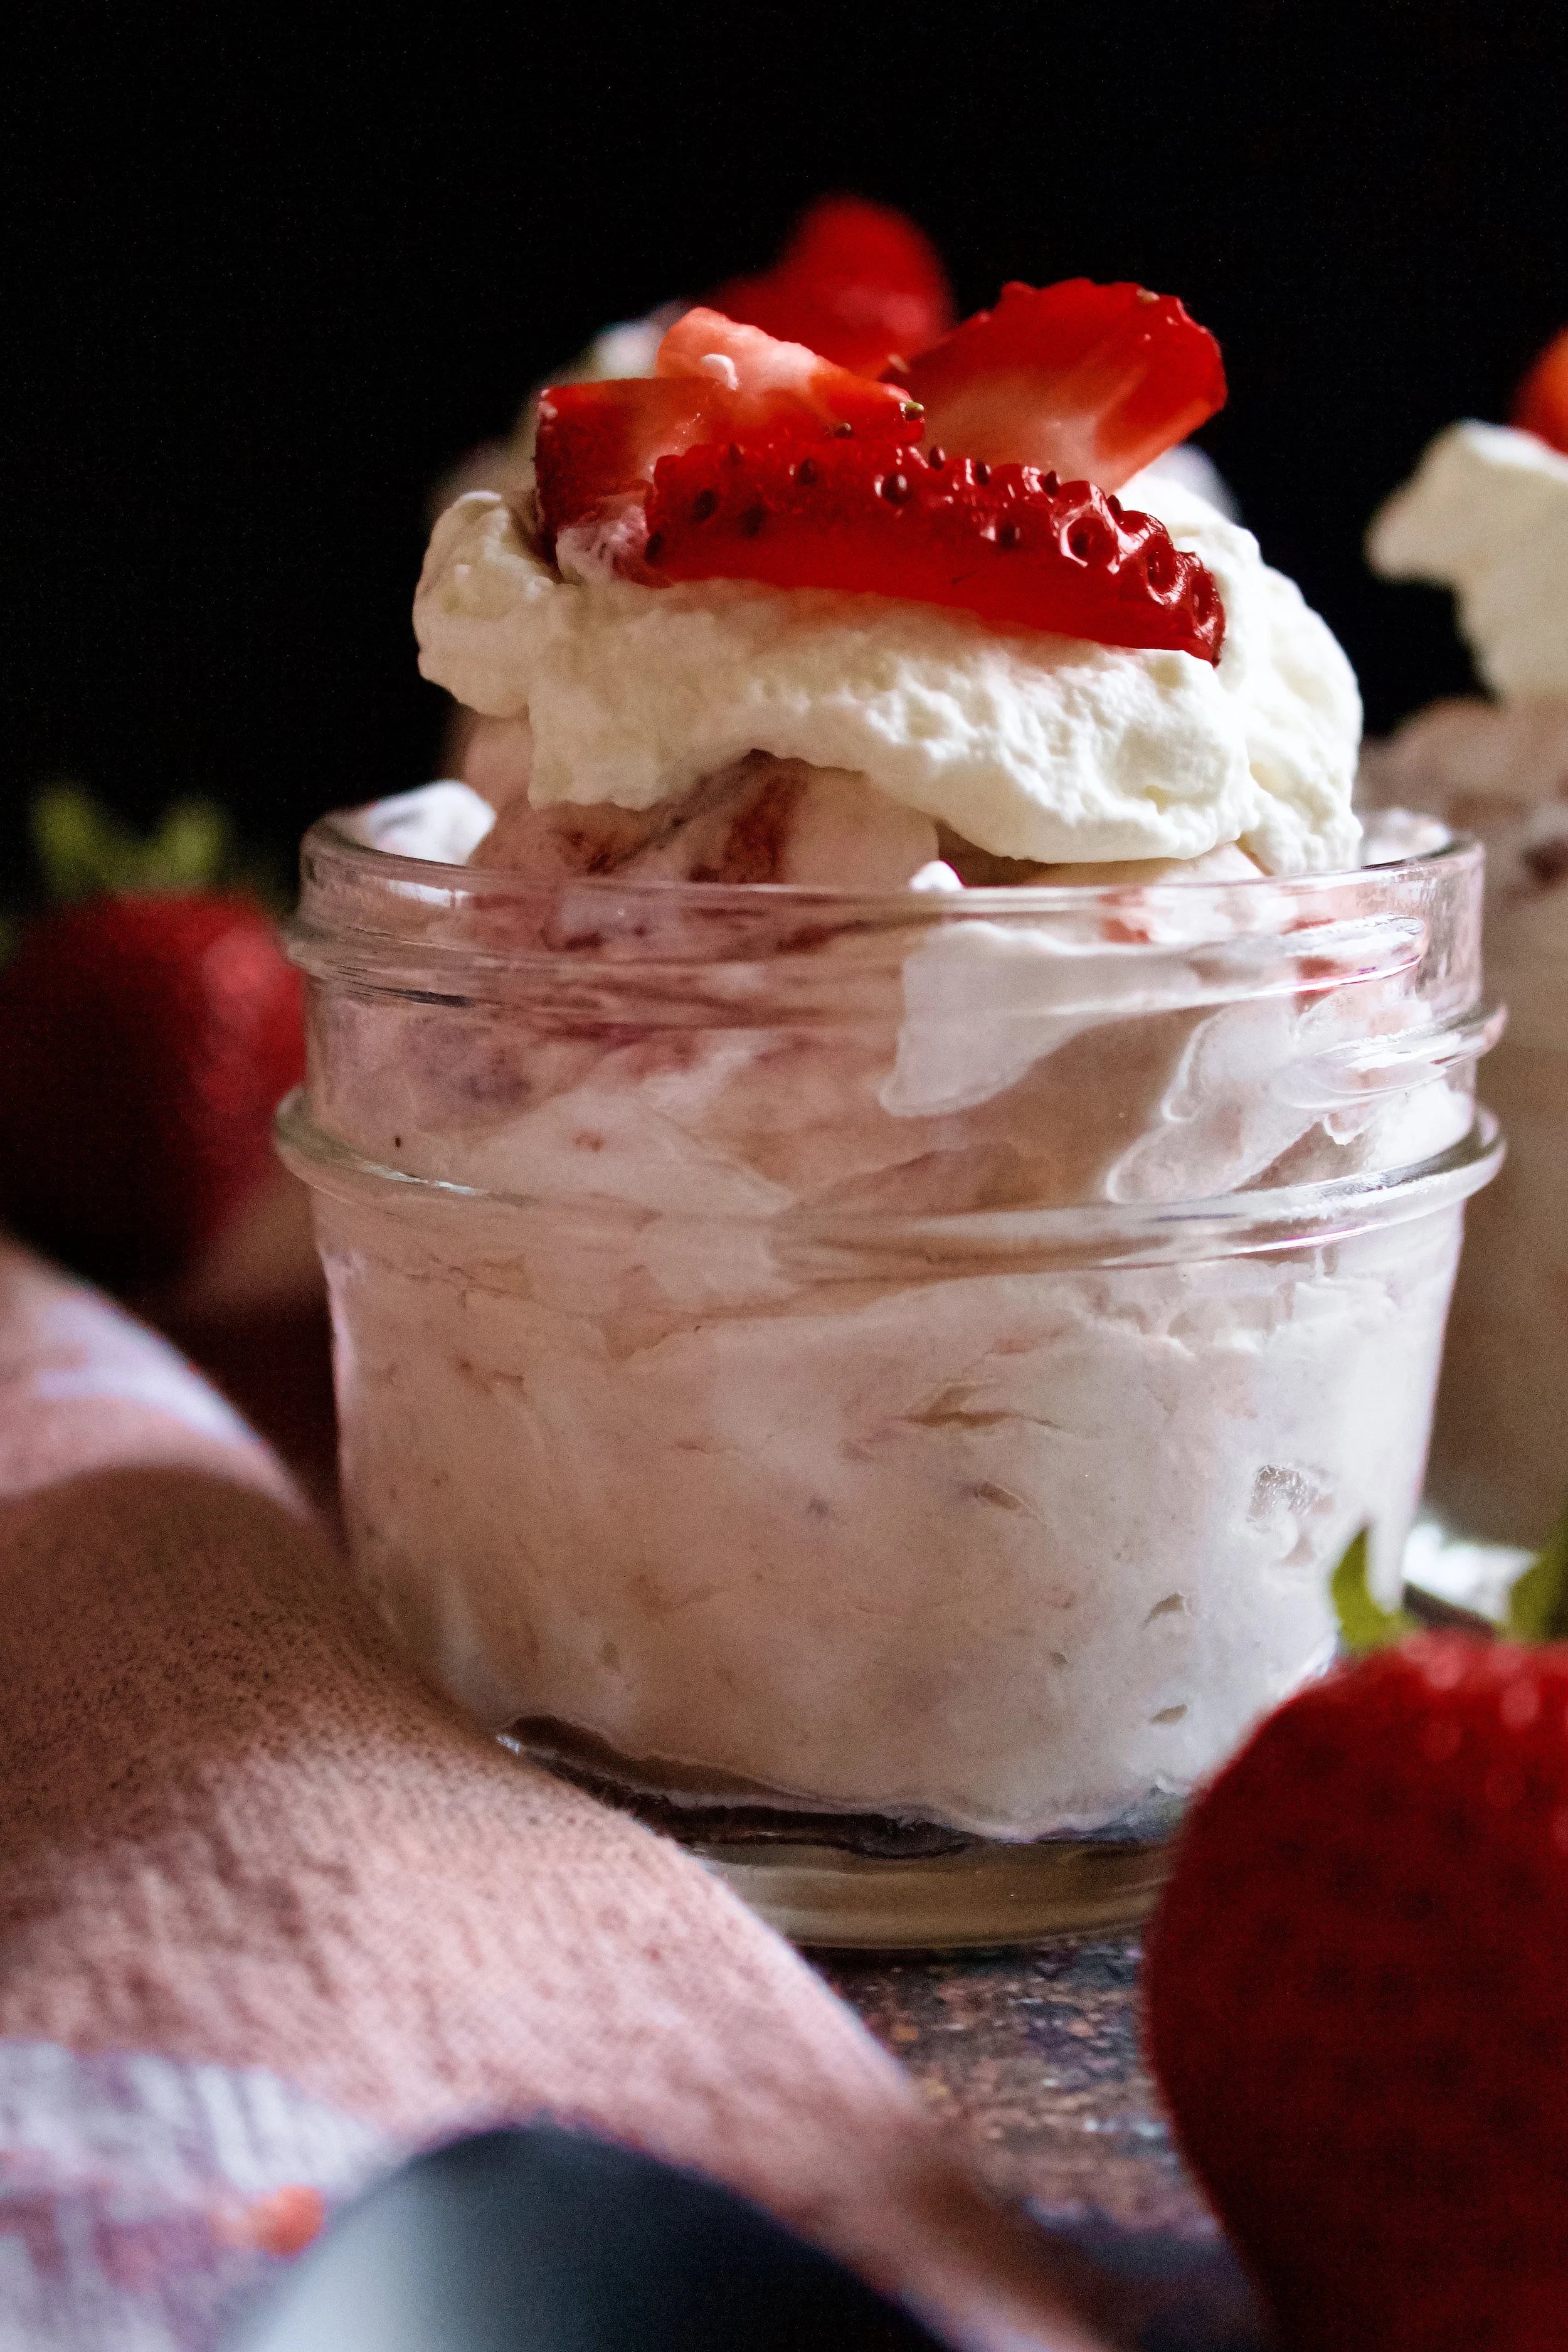
6. Chill*. Pour into small bowls or jars and chill at least an hour, ideally 4-8 hours.
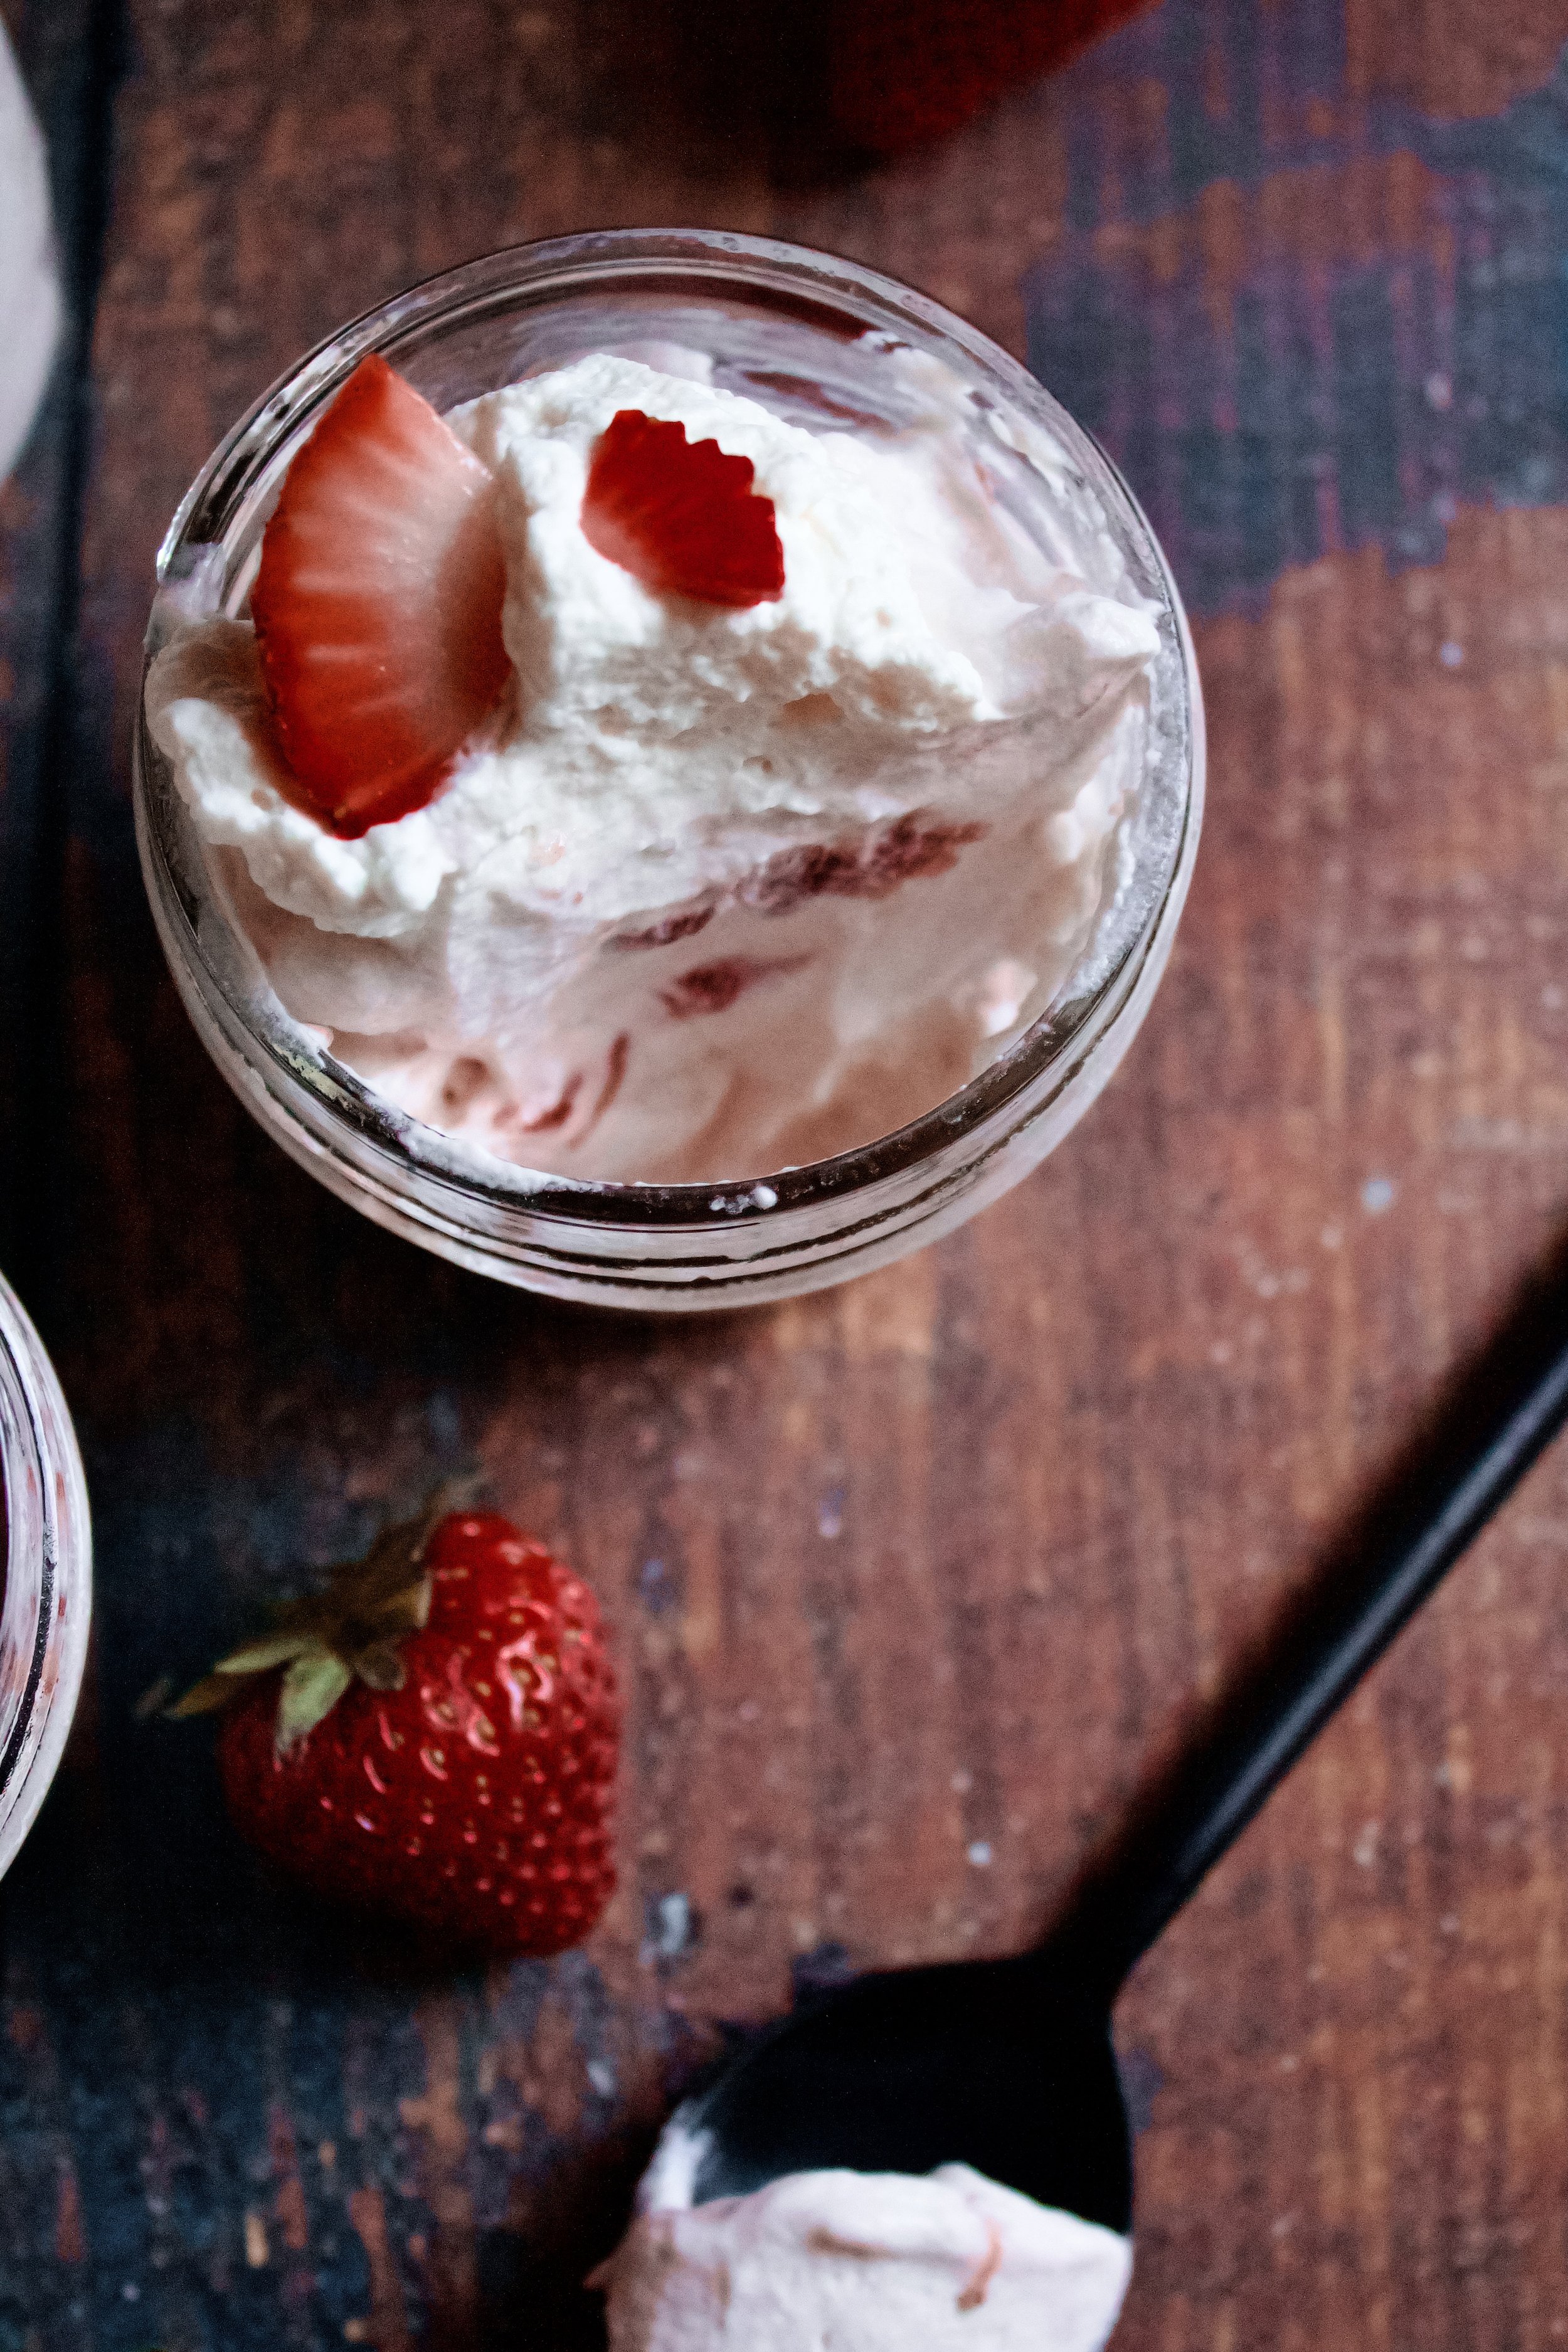
7. Top with whipped cream and strawberries. I used more homemade whipped cream, although I prefer to do soft peaks for topping if I can (I got distracted by children and went too far for these photos—whomp whomp).
Enjoy!

Tips and FAQ’s for this recipe
How should I serve this?
Honestly, just with a spoon! I chose to top it with a dollop of whipped cream and some fresh raspberries, but you can also top it with some grated chocolate (literally just take your favorite chocolate bar and use a small grater or zester to make little shavings right over the mousse). This also works well on top of brownies, in any kind of pie crust, or as a cake filling! (See above if using in a cake.)
*Can I use this in a cake?
Yes! That’s where this recipe originated. The recipe has a note about using this in a cake, but to clarify: be sure you freeze it between layers (before adding cake on top) and use a nice, sturdy ring of buttercream around the edge of the cake layer BEFORE filling with mousse. Freeze again once assembled and before frosting, so it doesn’t slide around. After frosting, I usually freeze it AGAIN, to be safe. Keep refrigerated, as the mousse can go bad.
Do note, mousse filling shouldn’t be too thick, or it can cause the cake to fall or slide around. If you’re able to keep it in the fridge, then it should be fine. But if you plan to serve this cake at an outdoor party, 1) do thinner layers of mousse (you can cut the cake in half to make more mousse overall) and 2) don’t keep it in the sun and don’t keep it out longer than a few hours.

Keep refrigerated
The cream requires that this be refrigerated so it doesn’t spoil. If using in a cake, you can take it out for a few minutes before cutting so the frosting isn’t too hard to cut. As well, if you have leftover pieces of cake, be sure to cover well, as refrigeration will cause the cut cake to dry out.
What kind of jam should I use?
I’ve used all kinds, from homemade to store bought. This recipe (minus the basil) would be a good base. It all depends on what’s in season, as fresh, in-season strawberries make the best jam, but winter berries are usually flown in and just not the same flavor.

My mousse tools
Here are my must-have tools I use for making this mousse. Affiliate links provided.
All-rubber spatula (this makes scraping the bowl sooo much easier)


Easy Strawberry Mousse
- prep time: 10-15 minutes minutes
- chill time: 1 hour (or overnight)
- total time: 1 hour, 15 minutes
servings: 6-8
Ingredients:
- 1 teaspoon (3g) powdered gelatin
- 1 tablespoon (15g) filtered water, cold or room temperature
- 1 tablespoon (15g) boiling water
- 1 ¾ cup (420g) heavy whipping cream, divided
- 1 tablespoon (13g) pure vanilla extract, divided
- ½ cup (65g) powdered sugar, divided
- 1 cup (about 300g) strawberry jam (homemade or store bought)
- a few diced strawberries, to top
Instructions:
- Place the cold water in a measuring cup with a pour spout. Sprinkle the gelatin over it and stir to combine. Set aside to bloom for 5 minutes (it will become firm). Prep your boiling water so it’s ready in 5 minutes.
- While the gelatin blooms, prep the cream. In the bowl of your stand mixer fitted with the whisk attachment (or a medium mixing bowl, using a hand mixer), combing 1 cup (240g) of the heavy cream, ½ tablespoon of the vanilla, and ¼ cup of the powdered sugar, if using. (Note: if my jam isn’t super sweet, I like to use powdered sugar since the whipped cream dilutes the flavor a bit. For the remaining whipped cream (for the topping) I always use powdered sugar.)
- Mix the cream on low until combined and all sugar has mixed in.
- Take 1 tablespoon of boiling water and mix it with the bloomed gelatin. Stir quickly until it’s fully liquid again (it’s a very thick liquid).
- Turn the mixer with the cream to medium and very slowly pour the gelatin in. You want to pour it right into the cream but avoid hitting the whisk AND the side of the bowl (a hand mixer can help create more space for pouring). Continue mixing on medium until the cream stops splattering.
- Once the cream stops splattering, turn the mixer to high (medium-high if you’re not experienced at making stabilized whipped cream). Mix until stiff peaks form and the cream begins to turn matte in appearance. Stiff peaks will hold their shape and not create that fancy dollop if you hold the beater up.
- Place the strawberry jam in a medium mixing bowl. Add about ⅓ of the whipped cream and gently fold it in with a rubber spatula (folding means to scrape your spatula along the sides of the bowl, pulling/folding it into the middle once you’ve come all the way around). Continue with another ⅓ of the whipped cream. Taste. If the strawberry flavor isn’t very noticeable, you can add ¼ cup at this point to get a brighter flavor. Fold in the remaining ⅓ of the cream.
- Divide between ½ cup bowls or jars (or use immediately as a cake filling–see not below). Refrigerate for at least 1 hour, ideally overnight.
- Once the mousse is set, you can combine the remaining ¾ cup heavy cream, the remaining ½ tablespoon vanilla, and the remaining ¼ cup powdered sugar. Mix with a stand mixer using the whisk attachment or a handheld mixer until soft peaks form. Top each bowl with some whipped cream and diced strawberries.
Enjoy!
Refrigerate until serving. If not serving that day, cover with plastic wrap until ready to eat.
Note: If using as a cake filling, you can omit step 9 (and the extra cream, vanilla, and sugar). After spreading the first layer, freeze about 5 minutes after spreading each layer of mousse and before adding anything on top of the mousse. Freeze at least 10-20 minutes before frosting your cake.